Cart is empty


![]()
OVERVIEW of Freesat HD Kit
- This kit contains everything you need to be able to receive Freesat HD. All you need is a TV set
- Note: Does not contain satellite meter
- Note: Please don't confuse with Freesat+ Kit (Freesat+ kit contains Freesat+ receiver which has integrated hard drive)
- Freesat HD boxes do not have an integrated hard drive for recording
The Kit consists of:
- Freesat HD Receiver
- 1m HDMI Lead
- Sky Type Satellite Dish & Single LNB
- Satellite Installation Kit
USES of Freesat HD Kit
- To receive the Freesat HD channels in both standard and high definition (HD)
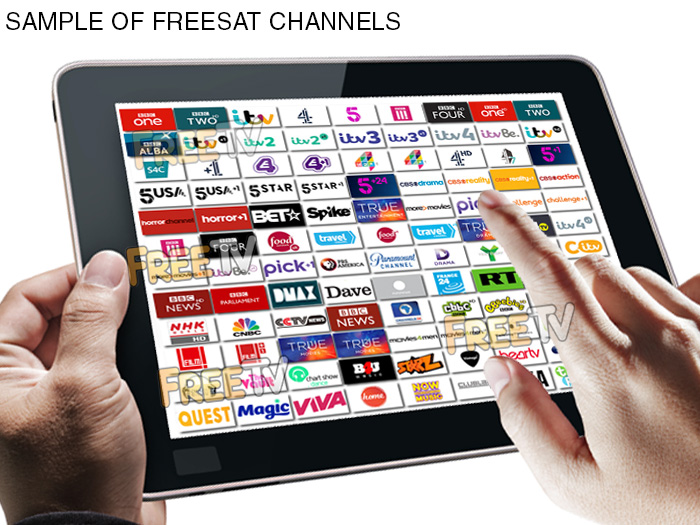
- Channels that can be received on Freesat HD include
- BBC 1 HD, BBC 2 HD, BBC4 HD, CBBC HD, Cbeebies HD
- UTV, ITV 2,3,4, ITV HD, CITV
- Channel 4 HD, E4, More 4, Film 4
- BBC News, Channel 5
- Showcase, EWTN, Challenge, Pick TV, CBS, Travel Channel, Food Network, Dave, Quest, Really, Home etc..
- Ideal for the main TV room, the bedroom or the kitchen
ADVANTAGES of Freesat HD Kit
- The Freesat box...
- Is an extremely reliable model by Manhattan
- It is easy to tune in, just use a UK postcode (BT1 1AA recommended for Ireland)
- Supports both standard and high definition transmissions
- Because the receiver is a Freesat box, it has a 7 day EPG
- If frequencies change, the box will automatically update itself
- This is a complete kit
- It is very competitively priced
- It contains everything to do the job
- The dish is ideally sized and designed for the Irish market
DISADVANTAGES of Freesat HD Kit
- More expensive than buying a generic free to air kit
- It does not have an RF output to allow channels to be viewed in a second room
Note: Video is overview of receiver. Kit also includes dish and installation kit
Index
- How to Assemble a Zone 2 Satellite Dish
- How to Mount a Zone 2 Satellite Dish
- How to Align a Zone 2 Satellite Dish
- Running Cables & Attaching Connectors
- Installing Your Satellite Receiver
1. How to Assemble a Zone 2 Satellite Dish
List of satellite dish components
- 60cm Satellite Dish
- Wall Bracket
- Wall Tube (Arm)
- Elevation Bracket
- Dish Bracket
- Fixing Kit
- Feed Arm
Tools Needed to Assemble Satellite Dish
- 10mm, 13mm socket and ratchet
- Philips screwdriver
Steps to Assemble Satellite Dish
- Open fixing kit and select U-bolts (qty: 2), nuts (qty: 4)
- Insert the U bolts through the wall bracket
- Thread on the nuts
- Insert the arm and tighten the nuts using 10mm socket and ratchet
- The wall bracket & arm assembly is complete
- Next insert U-bolts (qty: 2) through the elevation bracket
- Loosely tighten nuts
- Attach the elevation bracket to the dish bracket
- Using bolts and washers (qty: 4), tighten with 13mm socket and ratchet
- Use the bolts and nuts (qty:4) and the Philips screwdriver to attach the dish bracket to the dish
- Use the long threaded bolt and small nut to attach the feed arm to the back base of the dish bracket so the arm protrudes in front of the dish
- Finally insert the LNB (and plastic insert) into the end of the arm and secure with a tie wrap
2. How to Mount a Satellite Dish
Equipment needed to mount a satellite dish on a wall
- Zone 2 satellite dish, complete with wall bracket and arm
- Coach bolt M8 x 50mm & 10mm plastic plugs (qty: 4)
Tools needed to mount on a wall
- Cordless drill - ideally a 24-36v SDS Drill
- 8mm, 10mm drill bits
- 10mm, 13mm socket and ratchet
- Satellite meter
Criteria on where to mount the satellite dish?
- Dish must face South East (141 degrees i.e. direction of sun 11am BST)
- Wall must be a solid surface capable of carrying weight of satellite dish
- Signal must not be blocked by houses or trees (signal is coming in at 21 degrees to the horizontal)
- Place at back or gable end of house to minimise visual intrusion
- Place as close at possible to TV room to which the satellite cables are to connected so as to minimise cable run
Steps
- Place the wall bracket and arm in the correct location
- Use the cordless drill and 8mm drill bit to drill 4 guide holes
- Use 10mm drill bit to drill holes to a depth of 60mm
- Insert the 4 plastic plugs in the holes and mount the wall bracket using the 4 coach bolts
- Tighten the coach bolts using the 13mm socket and ratchet
- Attach the satellite dish to the arm of the wall plate
- Use 10mm socket to lightly tighten the dish 'U'-bolts so they are fixed to arm but the dish can still be rotated
- Follow steps in the how to align a satellite dish guide
3. How to Align a Zone 2 Satellite Dish
- Having already mounted the satellite dish on your wall
- Attach your satellite meter to the dish LNB
- Align the dish so that it is (1) perfectly vertical, (2) pointing south east (141 degrees).
- Rotate the dish slowly over and back
- Repeat adjusting the tilt angle by 1 or 2 degrees to until a signal is found
- Tighten the U-bolts and side bolts using the 10mm & 13mm sockets
- Disconnect the satellite meter
- Connect a cable with an 'F-type' connector from the dish to the satellite box
- Check that the signal is working
4. How to Run Cables & Attach Connectors
The next step is to run satellite cable to the satellite receiver
Tools needed
- Hammer
- Snips
- Drill
- SDS Drill Bit 10X450
Equipment
- Satellite Installation Kit
Prior to beginning you must decide
- Decide how to run cable
- Connect into existing cables in the attic
- Normally neater but requires additional connectors
- May need a multi-meter to be able to identify the correct cable
- May result in longer cable runs
- Run a cable directly from the satellite dish to the satellite receiver
- Fastest and easiest way to run a cable
- Cable runs are normally shorter
- Requires the drill of a hole through a wall
- Connect into existing cables in the attic
STEPS
- If the satellite receiver is to be located next to the external wall of a room
- Use a drill and an SDS Drill Bit 10x450 to drill a hole through the wall
- Ensuring to drill from the inside out
- To conceal broken plaster use either
- Hole tidy (insert inside and out before the cable is run)
- Cable cover nailed onto the outside wall after the cable has been run
- Feed the end of the satellite cable through the wall leaving enough cable to reach the front of the satellite box
- Now start tacking the cable using 7mm clips and a hammer
- Ensuring that the cable runs down from the hole that been drilled in the wall
- This will stop water following the cable into the house
- Continue tacking the cable
- Run cable vertically or horizontally but NEVER diagonally
- If possible hide cable under the plinth or behind drain pipes (using 300mm cable ties)
- Cut the cable leaving enough length to reach the LNB of the dish
- Put on an F connector on the each end of the satellite cable
- Screw the F connector on to the LNB
- Seal the connection using Insulation tape or ideally waterproof self amalgamating tape
- Secure the cable to the dish feed arm using either 300mm cable ties or Insulation tape
- Final step is to put on an F connector on the satellite cable next to the satellite receiver
How to Put on F-Type Connectors
5. How to Install Your Satellite Receiver
- Unpack the box
- Satellite receiver
- Remote control
- Screw the lead from the satellite dish into the LNB in connection
- Connect a scart or HDMI cable from your TV to the box
- Plug in the power lead
- Turn on the power switch on the back on the box
- After 5-6 seconds the box will come on and should automatically switch TV to AV channel
- You may need to switch AV channel on TV if it does not automatically switch over
No posts found
INDEX
- Overview
- Free to Air
- Freesat
- Freeview
Overview
The 3 terms widely (and often incorrectly) used to describe a receiver to get the free satellite channels are as follows
- Free to Air: Received by a Generic Satellite Receiver
- Freesat: Received by an ITV/BBC Patented Satellite Receiver
- Freeview: NOT Received by a Satellite Receiver - It"s a Digital Terrestrial TV Service
Below we give full details of the differences
Free to Air (FTA)
- This is received using a generic satellite receiver and is used with a satellite dish
- It is Free to Air meaning it is used to pick up free satellite channels
- But can come with a card slot to allow it to be used for subscription services
- It is capable of working with any satellite (so long as the dish is large enough)
- Manufactured by a range of up to about 120 different companies
- Boxes can come in the following formats
- Standard definition
- High definition
- Twin feed HD to allow you to record one channel & look at another
- HD Satellite & Terrestrial Combo receiver
- Good Points
- It is non subscription
- It is very versatile in terms of channel line up and satellite"s that can be accessed
- Huge range of different boxes
- Generally cheaper than official freesat boxes
- Drawback
- Unlike freesat
- It does not automatically update if their is a frequency change
- or new channels becomes available
- Getting spare remotes can sometimes be an issue
- Unlike freesat
- Main channels include (on astra 2, but totally flexible):
- BBC 1,2,3,4,
- UTV, ITV 2,3,4,
- Channel 4, E4, More 4, Film 4
- 6 News Channels, 7 Childrens, 8 Movie channels etc
- We stock these in our free to air satellite receiver section
Freesat
Main points
- This is a satellite receiver
- Works in conjunction with a satellite dish
- It meets the Freesat standards set out by ITV/BBC
- It will work anywhere in Ireland from a 60cm satellite dish
- It comes in range of types
- Freesat SD: SD with no hard drive
- Freesat HD: HD with no hard drive
- Freesat+ HD: Twin feed, HD, with hard drive, series link, 7 day EPG etc
- What makes Freesat special?
- It is non subscription
- It has a standard channel line up (program box with a UK Post code)
- It automatically updates if there is a frequency change
- or new channels becomes available
- Easy to get spare remotes
- Drawbacks
- It is generally more expensive than free to air boxes
- It is not as flexible - i.e. you can"t decide the order of the channels in freesat mode
- Only works off the Astra 2 at 28 East satellite
- Main channels include
- BBC 1,2,3,4,
- UTV, ITV 2,3,4,
- Channel 4, E4, More 4, Film 4
- 6 News Channels, 7 Childrens, 8 Movie channels etc
- We stock these in our Freesat Satellite Receivers section
Freeview
Main points
- This is a terrestrial service (NOT a satellite service)
- Works with UHF aerial rather than a satellite dish
- It meets the Freeview standards set out by ITV/BBC
- It does not generally work in Ireland (Except along NI border & East coast)
- We do not stock Freeview boxes
- What people generally mean when they say Freeview is that they are looking for either
- A Free To Air Receiver
- A Freesat Receiver
We aim to provide a fast, reliable & low cost delivery service
All orders we ship, leave our warehouse on time
- Standard Courier With Fastway (2-4 Working Days)
- Cost is €3.95 on Orders Below €100
- Free Delivery on Orders Above €100
- Express Courier (1-2 Working Days)
- With Fastway: Cost is €6.50 (or €2.50 extra if you qualify for free standard shipping)
- With DPD: Cost is €7 (or €3 extra if you qualify for free standard shipping)
- This service guarantees that any order placed before 4.30pm with Fastway or 3pm With DPD (Mon - Fri) will ship from our depot that same day on the express delivery service*
- *Orders placed after 4.30pm with Fastway or 3pm with DPD on Fridays & during weekends / bank holidays will be shipped the next working day
- An Post
- Cost is €2.50 (P & P)
- Available only on selected products with the An Post logo
- Small Parcels
- Cost is €3.50
- Available only on products with the small parcels logo**
- Great Britain
- Cost is €7.50
- Western Europe
- Cost is €10
- Belgium, France, Germany, Holland, Italy, Lithuania, Luxembourg, Spain, Portugal etc..
- Rest of Europe
- Cost is €20
- Croatia, Czech Republic, Estonia, Iceland, Malta, Slovenia, Switzerland, Norway, Sweden, Finland etc..
- Rest of World
- Cost is €30
- Please contact us before purchasing to confirm
Terms
- All shipping fee prices listed are ex-VAT @ 23%
- Irish shipping rates apply to the whole Island (North & South)
- Shipping fee is fixed for an order, regardless of the number of items bought
- All courier orders require signed proof of delivery and the customer must be contactable by phone
- We do not offer a weekend delivery service (Mon-Fri only excluding bank holidays)
- *Our courier achieves a 98% success rate on express deliveries
- ** Applies to island of Ireland only (North & South)
- Heavy or Large Parcels (Applies only to Non Irish or UK customers): It may be necessary to charge higher shipping fees / offer option to cancel order

