Cart is empty


![]()
DESCRIPTION of Combi Receiver
- Labgear™ LCOM1 Combi Receiver
- Box Contains
- Labgear Combi Receiver
- HDMI Cable
- Remote Control & Batteries
- External Power Supply 12V ~ 1A (3 Pin Plug)
- Definition: Standard & High Definition
- Resolution: Up to 1080p
- Aspect Ratio: 4:3, 16:9
- Tuner:
- DVB-S2 / S2X (Satellite)
- DVB-T / T2 (Hybrid)
- Features
- 2x USB 2.0 Ports
- LNB IN
- Antenna IN
- Audio OUT (Digital Coaxial)
- HDMI OUT
- 3.5mm AV OUT (Analogue)
- RJ45 LAN/Ethernet Port
- LED Display
- DiSEqC 1.0, 1.1, 1.2, STAB, USALS
- Full HD H.265 Decoding Support
- 400 Channel Memory
- Multiple Languages
- Subtitle Support
- PVR Ready
- Internet Apps Like YouTube
- Colour: Black
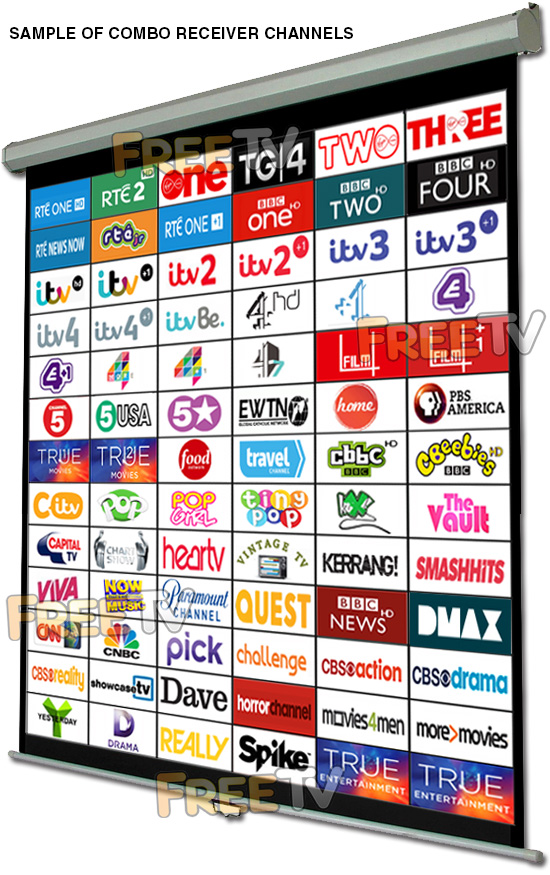
- Available Pre-Programmed with UK Free to Air Channels - See 'List of Channels' Tab
- Option to Purchase USB Powered IR Remote Control Extender (Hide Receiver Behind TV or in a Cabinet)
USES of Combi Receiver
- HD combi receiver for receiving both
- Irish Digital Terrestrial TV (Saorview Channels)
- Standard & HD UK Satellite Channels
- Channel List (See List of Channels Tab) Includes
- RTE 1, RTE 2, Virgin Media One, Virgin Media Two, TG4, Virgin Media Three, TG4, RTE One +1, RTEjr etc..
- Need to tune Irish channels to your local transmitter (See video guides)
- BBC 1, 2, 3, 4, UTV, ITV 2, 3, 4, ITV Be, Channel 4, More 4, E4, Film 4, Channel 4/7 etc..
- Channel 5, CBS, Showcase, Food Channel, Travel Channel, EWTN, VIVA, Pick, Challenge, Watch, Dave, Home, Really, Quest etc..
- CITV, CBBC, Cbeebies etc..
- BBC News, Euro News, CNN, CNBC etc..
- True Movies 1 & 2, Great Movies, True Drama, Horror Channel, Men & Movies etc..
- Huge Array of Music Channels
- All +1 Channels Where Available
- HD Channels include the following...
- BBC 1 HD, BBC 2 HD, BBC 3 HD, BBC 4 HD, CBBC HD, Cbeebies HD, UTV HD, C4 HD, BBC News HD, RTE 1 HD, RTE 2 HD etc..
- RTE 1, RTE 2, Virgin Media One, Virgin Media Two, TG4, Virgin Media Three, TG4, RTE One +1, RTEjr etc..
- PVR Features - Add recording with an external hard drive
- Equipment needed - 250GB, 320GB external hard drive etc..
- Can record a UK satellite channel while watching Irish Saorview channel and vice versa
- 12v combo receiver so ideal for caravans, campervans, motor homes, boats, mobile homes, HGVs, RVs etc..
ADVANTAGES of Combi Receiver
- The Labgear combi receiver is PVR ready
- Note: Need to add an external hard drive or memory stick for recording
- The combi receiver is both a HD satellite receiver & HD digital terrestrial receiver in a single unit
- Supports both standard & high definition transmissions
- It has a DVB-T2 tuner so is suitable for Saorview and Freeview HD channels
- The Labgear combi receiver is extremely competitively priced
- It futures proofs your investment by meeting all the latest HD standards
- It is connectable to the internet
- It comes with a 3 pin UK & Ireland plug unlike many competitor combi receivers
- It's media player supports MP3 / JPEG / BMP / AVI / DivX / VOB / MKV
- Ability to add a USB WiFi dongle to enable it's wireless internet function (Purchase separately)
DISADVANTAGES of Combi Receiver
- Does not support MHEG5 which will mean no teletext on HD terrestrial channels
- More expensive than either a HD satellite receiver or a standalone digital terrestrial receiver but cheaper than getting them separately
- It does not have an RF out ie. it is not possible to run the picture to an additional room unless you use either an external modulator or a TRI-Link (allows you to operate combo box with a sky eye from another room)
- Note: You may need to add in a 3.5mm to RCA cable & RCA to scart adapter if using either external modulator or Trilink with the combi receiver
- As it does not have a scart output, an RCA to scart adapter could be used to convert the RCA output to scart input on TV if you so desire. See associated products for RCA to scart adapter
- Note: If using our 3.5mm to RCA cable, you need to reverse the red and yellow connections
Coming soon...
Index
- How to Assemble a Zone 2 Satellite Dish
- How to Mount a Zone 2 Satellite Dish
- How to Align a Zone 2 Satellite Dish
- Running Cables & Attaching Connectors
- Installing Your Satellite Receiver
1. How to Assemble a Zone 2 Satellite Dish
List of satellite dish components
- 60cm Satellite Dish
- Wall Bracket
- Wall Tube (Arm)
- Elevation Bracket
- Dish Bracket
- Fixing Kit
- Feed Arm
Tools Needed to Assemble Satellite Dish
- 10mm, 13mm socket and ratchet
- Philips screwdriver
Steps to Assemble Satellite Dish
- Open fixing kit and select U-bolts (qty: 2), nuts (qty: 4)
- Insert the U bolts through the wall bracket
- Thread on the nuts
- Insert the arm and tighten the nuts using 10mm socket and ratchet
- The wall bracket & arm assembly is complete
- Next insert U-bolts (qty: 2) through the elevation bracket
- Loosely tighten nuts
- Attach the elevation bracket to the dish bracket
- Using bolts and washers (qty: 4), tighten with 13mm socket and ratchet
- Use the bolts and nuts (qty:4) and the Philips screwdriver to attach the dish bracket to the dish
- Use the long threaded bolt and small nut to attach the feed arm to the back base of the dish bracket so the arm protrudes in front of the dish
- Finally insert the LNB (and plastic insert) into the end of the arm and secure with a tie wrap
2. How to Mount a Satellite Dish
Equipment needed to mount a satellite dish on a wall
- Zone 2 satellite dish, complete with wall bracket and arm
- Coach bolt M8 x 50mm & 10mm plastic plugs (qty: 4)
Tools needed to mount on a wall
- Cordless drill - ideally a 24-36v SDS Drill
- 8mm, 10mm drill bits
- 10mm, 13mm socket and ratchet
- Satellite meter
Criteria on where to mount the satellite dish?
- Dish must face South East (141 degrees i.e. direction of sun 11am BST)
- Wall must be a solid surface capable of carrying weight of satellite dish
- Signal must not be blocked by houses or trees (signal is coming in at 21 degrees to the horizontal)
- Place at back or gable end of house to minimise visual intrusion
- Place as close at possible to TV room to which the satellite cables are to connected so as to minimise cable run
Steps
- Place the wall bracket and arm in the correct location
- Use the cordless drill and 8mm drill bit to drill 4 guide holes
- Use 10mm drill bit to drill holes to a depth of 60mm
- Insert the 4 plastic plugs in the holes and mount the wall bracket using the 4 coach bolts
- Tighten the coach bolts using the 13mm socket and ratchet
- Attach the satellite dish to the arm of the wall plate
- Use 10mm socket to lightly tighten the dish 'U'-bolts so they are fixed to arm but the dish can still be rotated
- Follow steps in the how to align a satellite dish guide
3. How to Align a Zone 2 Satellite Dish
- Having already mounted the satellite dish on your wall
- Attach your satellite meter to the dish LNB
- Align the dish so that it is (1) perfectly vertical, (2) pointing south east (141 degrees).
- Rotate the dish slowly over and back
- Repeat adjusting the tilt angle by 1 or 2 degrees to until a signal is found
- Tighten the U-bolts and side bolts using the 10mm & 13mm sockets
- Disconnect the satellite meter
- Connect a cable with an 'F-type' connector from the dish to the satellite box
- Check that the signal is working
4. How to Run Cables & Attach Connectors
The next step is to run satellite cable to the satellite receiver
Tools needed
- Hammer
- Snips
- Drill
- SDS Drill Bit 10X450
Equipment
- Satellite Installation Kit
Prior to beginning you must decide
- Decide how to run cable
- Connect into existing cables in the attic
- Normally neater but requires additional connectors
- May need a multi-meter to be able to identify the correct cable
- May result in longer cable runs
- Run a cable directly from the satellite dish to the satellite receiver
- Fastest and easiest way to run a cable
- Cable runs are normally shorter
- Requires the drill of a hole through a wall
- Connect into existing cables in the attic
STEPS
- If the satellite receiver is to be located next to the external wall of a room
- Use a drill and an SDS Drill Bit 10x450 to drill a hole through the wall
- Ensuring to drill from the inside out
- To conceal broken plaster use either
- Hole tidy (insert inside and out before the cable is run)
- Cable cover nailed onto the outside wall after the cable has been run
- Feed the end of the satellite cable through the wall leaving enough cable to reach the front of the satellite box
- Now start tacking the cable using 7mm clips and a hammer
- Ensuring that the cable runs down from the hole that been drilled in the wall
- This will stop water following the cable into the house
- Continue tacking the cable
- Run cable vertically or horizontally but NEVER diagonally
- If possible hide cable under the plinth or behind drain pipes (using 300mm cable ties)
- Cut the cable leaving enough length to reach the LNB of the dish
- Put on an F connector on the each end of the satellite cable
- Screw the F connector on to the LNB
- Seal the connection using Insulation tape or ideally waterproof self amalgamating tape
- Secure the cable to the dish feed arm using either 300mm cable ties or Insulation tape
- Final step is to put on an F connector on the satellite cable next to the satellite receiver
How to Put on F-Type Connectors
5. How to Install Your Satellite Receiver
- Unpack the box
- Satellite receiver
- Remote control
- Screw the lead from the satellite dish into the LNB in connection
- Connect a scart or HDMI cable from your TV to the box
- Plug in the power lead
- Turn on the power switch on the back on the box
- After 5-6 seconds the box will come on and should automatically switch TV to AV channel
- You may need to switch AV channel on TV if it does not automatically switch over
See map below for main Saorview transmitters in Ireland
The map shows the main Saorview transmitters, their coverage and the colour code (tip) of the best UHF aerial to use in that area

No posts found
INDEX
- Overview
- Free to Air
- Freesat
- Freeview
Overview
The 3 terms widely (and often incorrectly) used to describe a receiver to get the free satellite channels are as follows
- Free to Air: Received by a Generic Satellite Receiver
- Freesat: Received by an ITV/BBC Patented Satellite Receiver
- Freeview: NOT Received by a Satellite Receiver - It"s a Digital Terrestrial TV Service
Below we give full details of the differences
Free to Air (FTA)
- This is received using a generic satellite receiver and is used with a satellite dish
- It is Free to Air meaning it is used to pick up free satellite channels
- But can come with a card slot to allow it to be used for subscription services
- It is capable of working with any satellite (so long as the dish is large enough)
- Manufactured by a range of up to about 120 different companies
- Boxes can come in the following formats
- Standard definition
- High definition
- Twin feed HD to allow you to record one channel & look at another
- HD Satellite & Terrestrial Combo receiver
- Good Points
- It is non subscription
- It is very versatile in terms of channel line up and satellite"s that can be accessed
- Huge range of different boxes
- Generally cheaper than official freesat boxes
- Drawback
- Unlike freesat
- It does not automatically update if their is a frequency change
- or new channels becomes available
- Getting spare remotes can sometimes be an issue
- Unlike freesat
- Main channels include (on astra 2, but totally flexible):
- BBC 1,2,3,4,
- UTV, ITV 2,3,4,
- Channel 4, E4, More 4, Film 4
- 6 News Channels, 7 Childrens, 8 Movie channels etc
- We stock these in our free to air satellite receiver section
Freesat
Main points
- This is a satellite receiver
- Works in conjunction with a satellite dish
- It meets the Freesat standards set out by ITV/BBC
- It will work anywhere in Ireland from a 60cm satellite dish
- It comes in range of types
- Freesat SD: SD with no hard drive
- Freesat HD: HD with no hard drive
- Freesat+ HD: Twin feed, HD, with hard drive, series link, 7 day EPG etc
- What makes Freesat special?
- It is non subscription
- It has a standard channel line up (program box with a UK Post code)
- It automatically updates if there is a frequency change
- or new channels becomes available
- Easy to get spare remotes
- Drawbacks
- It is generally more expensive than free to air boxes
- It is not as flexible - i.e. you can"t decide the order of the channels in freesat mode
- Only works off the Astra 2 at 28 East satellite
- Main channels include
- BBC 1,2,3,4,
- UTV, ITV 2,3,4,
- Channel 4, E4, More 4, Film 4
- 6 News Channels, 7 Childrens, 8 Movie channels etc
- We stock these in our Freesat Satellite Receivers section
Freeview
Main points
- This is a terrestrial service (NOT a satellite service)
- Works with UHF aerial rather than a satellite dish
- It meets the Freeview standards set out by ITV/BBC
- It does not generally work in Ireland (Except along NI border & East coast)
- We do not stock Freeview boxes
- What people generally mean when they say Freeview is that they are looking for either
- A Free To Air Receiver
- A Freesat Receiver
We aim to provide a fast, reliable & low cost delivery service
All orders we ship, leave our warehouse on time
- Standard Courier With Fastway (2-4 Working Days)
- Cost is €3.95 on Orders Below €100
- Free Delivery on Orders Above €100
- Express Courier (1-2 Working Days)
- With Fastway: Cost is €6.50 (or €2.50 extra if you qualify for free standard shipping)
- With DPD: Cost is €7 (or €3 extra if you qualify for free standard shipping)
- This service guarantees that any order placed before 4.30pm with Fastway or 3pm With DPD (Mon - Fri) will ship from our depot that same day on the express delivery service*
- *Orders placed after 4.30pm with Fastway or 3pm with DPD on Fridays & during weekends / bank holidays will be shipped the next working day
- An Post
- Cost is €2.50 (P & P)
- Available only on selected products with the An Post logo
- Small Parcels
- Cost is €3.50
- Available only on products with the small parcels logo**
- Great Britain
- Cost is €7.50
- Western Europe
- Cost is €10
- Belgium, France, Germany, Holland, Italy, Lithuania, Luxembourg, Spain, Portugal etc..
- Rest of Europe
- Cost is €20
- Croatia, Czech Republic, Estonia, Iceland, Malta, Slovenia, Switzerland, Norway, Sweden, Finland etc..
- Rest of World
- Cost is €30
- Please contact us before purchasing to confirm
Terms
- All shipping fee prices listed are ex-VAT @ 23%
- Irish shipping rates apply to the whole Island (North & South)
- Shipping fee is fixed for an order, regardless of the number of items bought
- All courier orders require signed proof of delivery and the customer must be contactable by phone
- We do not offer a weekend delivery service (Mon-Fri only excluding bank holidays)
- *Our courier achieves a 98% success rate on express deliveries
- ** Applies to island of Ireland only (North & South)
- Heavy or Large Parcels (Applies only to Non Irish or UK customers): It may be necessary to charge higher shipping fees / offer option to cancel order

